There are many automatic irrigation systems on the market, comprising the following components, with a few variations;
• A battery-powered controller allowing the user to programme the irrigation run time according to requirements;
• A pressure reduction device (sometimes called the irrigation control unit), connected directly to the main pipe, which provides a suitable operating pressure;
• The main pipe (Ø 13 mm) supplying water as closely as possible to the vegetable garden or garden area;
• For a vegetable garden :
- a pipe (Ø 13 mm) with built-in drippers (this pipe is pre-supplied with orifices);
- valves (Ø 13 mm) to isolate the different branches (you can thus close off or open up each row according to the season and plantation) ;
- ‘T’ connections and stop plugs at the end of the line
• In the case of pot plants or flower beds :
- the capillary tube (Ø 4,6 mm) connected to the main line and the end connected to:
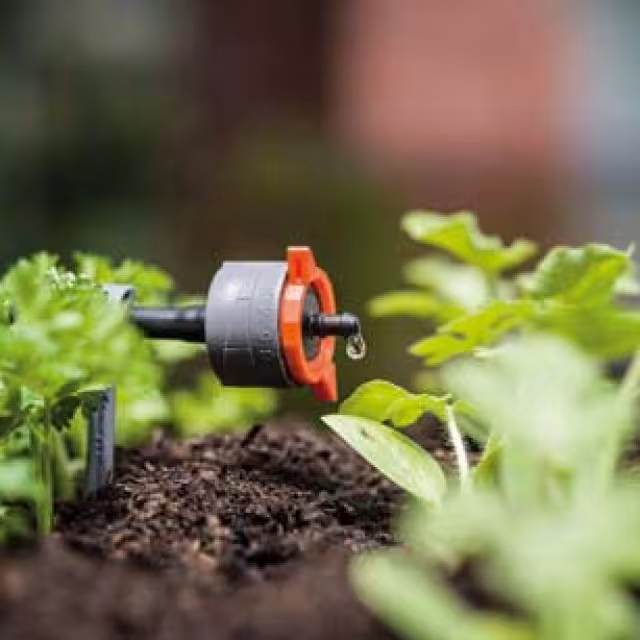
- drippers (linear or self-regulating) ;
- adjustable sprinklers (with stems of variable heights to spray water at a higher level);
- reduction devices (sold with a tool that allows the user to pierce the main pipe)
- supports sunk in the soil to keep the pipes and capillaries in place.
• In the case of hedges :
- porous pipes (Ø 13 mm), where the water seeps out along the whole length of the pipe;
- Connections (Ø 13 mm).
1. Preparing the installation
• Carefully determine the points of irrigation.
• Choose the type of irrigation according to the planting area and zones to be irrigated:
- drippers in the pots, in the hedges, at the foot of certain plants;
- sprinklers for the shrubs and flower beds;
- drip tubes for the vegetable garden, to irrigate the base of the crops, spaced at a certain distance between your rows.
• Study in detail the plots of land so as to be able to assess the length of the main pipe and capillary tubing required for your installation.
• Don’t hesitate to draw a diagramme, as this will allow for a more practical approach to be adopted.
2. Installing the drip irrigation system
• Fasten the controller to the garden tap.
• Connect the section of main pipe to this device.
• Wind out the hose as far as the garden to be irrigated (flower beds, lawn, vegetable garden).
3. Example 1: Installing an irrigation system in the vegetable garden
With an irrigation system for the vegetable garden, water is trickled out along the length of each row. This is how it should be installed:
• Unwind the main pipe perpendicularly to the rows of the vegetable garden.
• Cut the hose at the end of each row.
• Fit a ‘T’ connection.
• Connect a valve to the fitting and then lay the tube with inbuilt drippers along the length of the row.
• Shut off the end of the line with a stop plug.
4. Example 2: Installing an irrigation system for flower beds
With the irrigation of the flower beds, your plants will be watered with sprinklers. Please observe the following guidelines for installation:
• Lay out the main pipe.
• Ensure that you have a sufficient length of capillary tubing to reach the flower bed.
• Use the scissors to cut the tube.
• Fasten a sprinkler to the end of the capillary tube.
• Attach the end to a support structure (sprinkler head riser) to give it more height.
5. Example 3: installing an irrigation system for pot plants
For the irrigation of pot plants, a capillary tube leads to each pot. To use this system at home you must:
• Lay out the main pipe.
• Prepare a sufficient length of capillary tubing to reach each one of the pots.
• Use the scissors to cut the tube.
• Attach a linear or adjustable dripper to the end of the capillary (according to the plant water requirements).
• Keep the tube in place with a support fixed to the ground.
6. Example 4: Installing an irrigation system for hedges
With this irrigation system, a porous tube runs along the length of the hedge.
• Wind out the main tube to the place where the hedge begins.
• Fit a connection.
• Attach a valve to this connection and then continue with the porous tube.